Wednesday, July 24, 2013

Designer Series Paper Special


If you took a spin through my craft area, you would see that patterned paper is my most abundant supply.  I LOVE patterned paper....it's a wonderful, and relatively inexpensive, way to add layer and interest to scrapbook pages without adding too much lumpiness.  In fact, I started my relationship with Stampin' Up! in an effort to try and use up the leftover patterned papers from my scrapbooks by creating cards and gifts.  Well, that didn't work as now I have access to Stampin' Up!'s beautiful Designer Series paper.  Check out all of our beautiful Designer Series Paper, and take advantage of this sale.  For every three you buy at regular prices, you get one for FREE!!!

Here's the details:
Offer Dates: July 1-31, 2013
Offer Details: Buy three packs of select Designer Series Paper and get one for free!
  • These items don't qualify for the offer: Designer Series Paper Stacks, Specialty Designer Series Paper, Designer Series Paper ordered through hostess benefits
  • Orders may be placed on any type of order (workshop, customer, or online).
  • No limits. Order six? You'll get two for free. Nine? You'll get three for free.
  • Check out our Designer Series Papers in the annual catalog pages 151, 153, and 154.
Contact me to place your order today.  Only a week remains for this special offer!!!

Thursday, March 7, 2013

Happy Birthday, Melissa!!!

If you would like to pin this to Pinterest, please hover over the image and then click on the P. 

My cousin, Melissa's birthday was in the end of February, so I created this card for her.  I wanted something clean & contemporary, which is her style.  I also know she is favoring greens right now and damask prints - so this what I ended up with.  I like it.  I hope she does, too!

So, here's what you're going to need if you'd like to make this card yourself:
Paper: Basic Gray, Whisper White, Summer Starfruit, and Gumball Green cardstock
Ink: Basic Gray, Summer Starfruit, Basic Gray (for the inside) and Gumball Green ink pads
Stamps: Summer Silhouettes, any sentiment you desire* (I used a retired Happy Birthday sentiment).
Other: Adhesive (Snail for assembling most of the layers, Dimensionals behind the gray label to pop it up from the card, and Sticky Strip**), Labels Collection Framelits and coordinating Festive Paper Piercing Pack, paper piercer and foam for piercing on.

*this card would also be great for other occasions, like Mother's Day, or as thank you, get well, sympathy, and thinking of you cards - just dig through your stash and find one that fits...and of course, have fun experimenting with different color combos to match the mood of those other occasions.

**Tip: I like to use Sticky Strip whenever I'm adhering smooth layer to an embossed layer.  It seems to get into the crevices a bit better and without smooshing the embossing back down.  For example, on this card, I used it to adhere the Summer Starfruit Layer to the embossed Gumball Green layer, and the embossed Gumball Green layer to the Whisper w\White layer.

Don't forget to have fun with the inside - here's what I did, leaving me plenty of room to write a personal note.


Tuesday, March 5, 2013

Playing with Pleasant Poppies - Day 4

If you would like to pin this to Pinterest, please hover over the image and then click on the P.  

Welcome to the final day of my Pleasant Poppies spree!  I had a lot of fun playing with this set, and as you can see, there is enough similarity between the 4 cards (see three previous posts) that you could sit down and whip all four out in one sitting.  This is my personal favorite of the four cards I've posted using this set, so I saved it for last.  Which is your favorite?

To re-create this card, you'll need to gather:

Paper: Designer Series Paper* (this particular pattern is retired), cardstock to coordinate with your DSP (I used Poppy Parade (retired), Basic Black, and Whisper White).

Stamps: Pleasant Poppies, Teeny Tiny Wishes

Ink: Old Olive marker, Basic Black Craft ink pad, Poppy Parade ink refill (retired)

Other: adhesive pearl rhinestones, adhesive (I used Snail), black embossing powder, embossing heat tool, aqua painter.

*as an alternative to DSP, you could use plain, colored cardstock.  Or you could jazz up the cardstock by embossing it with a Textured Impressions Embossing Folder or stamping with Versamark or colored ink.

Saturday, March 2, 2013

Playing with Pleasant Poppies - Day 3

If you would like to pin this to Pinterest, please hover over the image and then click on the P. 

Today's Pleasant Poppies card uses the same watercoloring techniques as the last two. But, I decided to pair it with some Designer Series Paper (this particular pattern is retired, but many of our DSP's will work well with this). I tried to keep the embellishments simple - ribbon with no bow and a simple punched, layered sentiment. Come back in a few days for my final Pleasant Poppies card.

To make this card you will need:

Paper: Basic Black, Whisper White, and Poppy Parade (retired) cardstock; Designer Series Paper* (while this particular pattern is retired, many of our current papers would look great - just modify your ink & cardstock colors to accomodate).

Stamps: Teeny Tiny Wishes, Pleasant Poppies

Ink: Old Olive marker, Basic Black Craft Ink, Poppy Parade Refill (retired)

Other: narrow white ribbon, black embossing powder, embossing heat tool, adhesive (I used Snail to adhere the layers together & Dimensionals to pop up the sentiment), Modern Label Punch, and Word Window Punch.

*as an alternative to DSP, you could use plain, colored cardstock. Or you could jazz up the cardstock by embossing it with a Textured Impressions Embossing Folder or stamping with Versamark or colored ink.

Happy Stamping!!!

Thursday, February 28, 2013

Playing with Pleasant Poppies - Day 2

If you would like to pin this to Pinterest, please hover over the image and then click on the P. 

I was cruising Splitcoaststampers.com one evening (if you haven't been there, check it out - TONS of stamping ideas!!!), when I came across this beautiful card by Karen Barber (actually, all of her work is just beautiful).

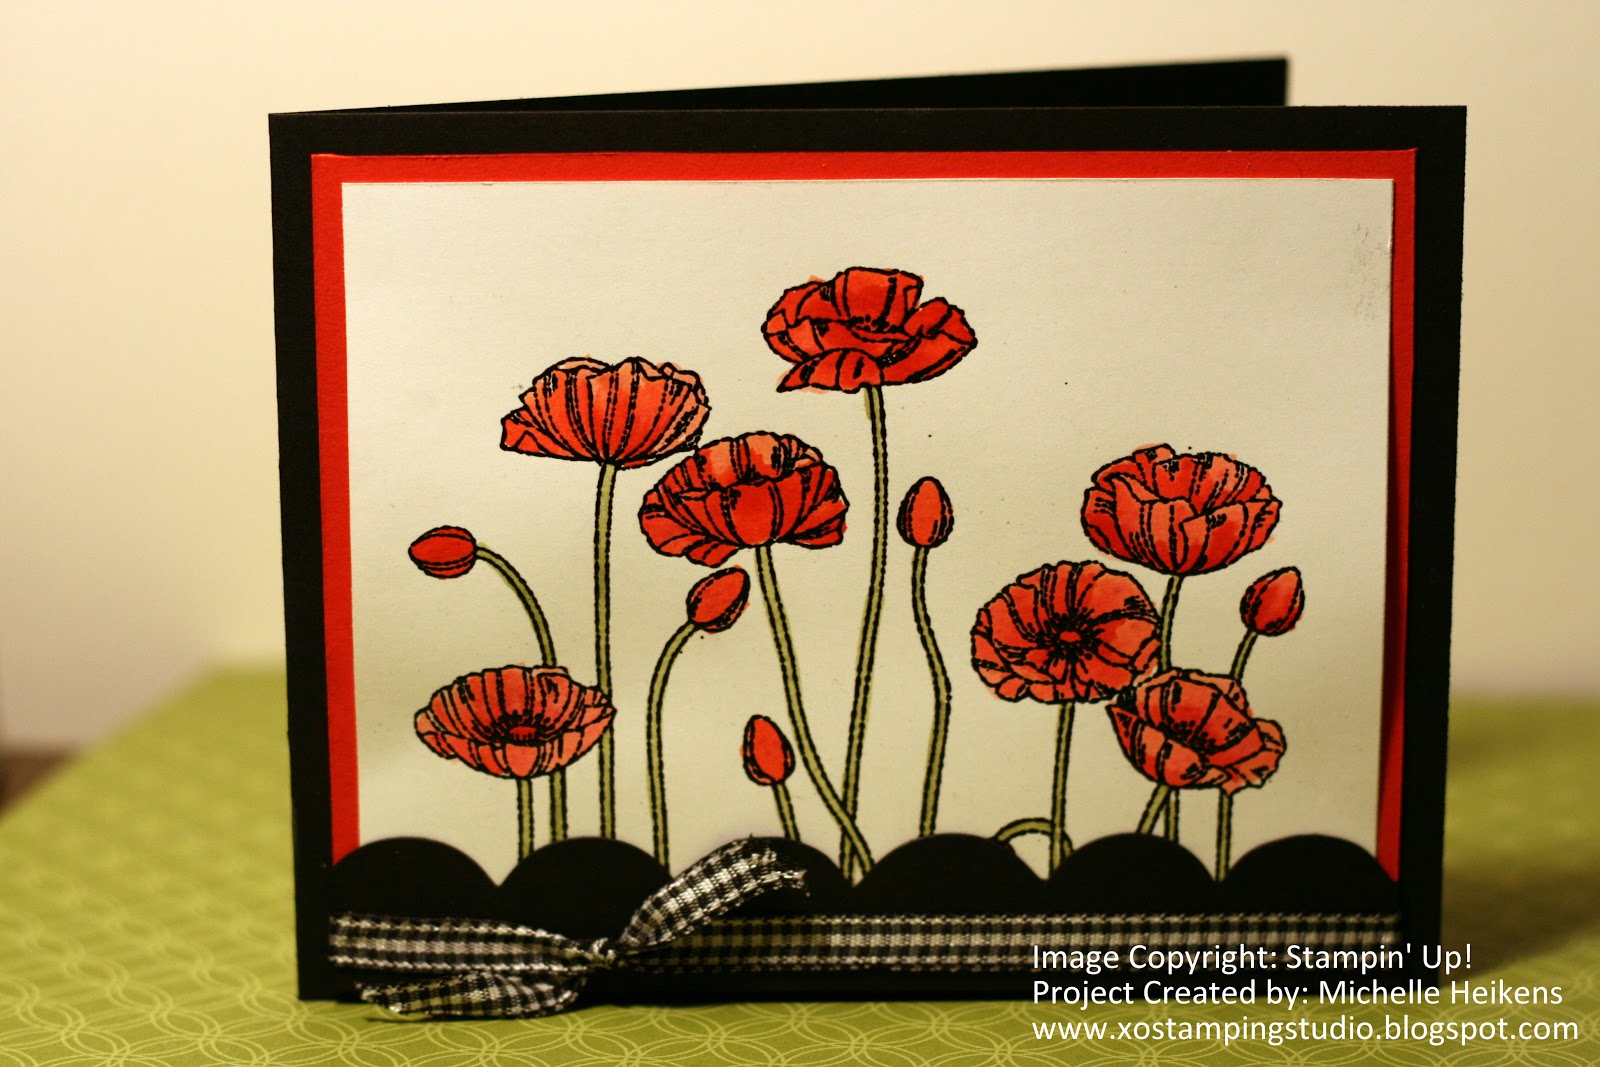
So, I adapted the card a bit to fit the supplies I had on hand and this is what I came up with.  A little simpler than hers, but still pretty, I think.  I showed these poppy cards to my mom and of the four, this one is her favorite (but she's a sucker for anything with gingham or polka dots).

To make this card, you'll need:

Paper: Whisper White, Poppy Parade (retired), and Basic Black cardstock
Ink: Basic Black Craft Ink, Old Olive marker, Poppy Parade refill ink (retired)
Stamps: Pleasant Poppies (background stamp)
Other: Adhesive (I used Snail), Black Embossing Powder, ribbon (I just used up a piece from my stash), Big Shot, Bigz XL Tasteful Trim die (that's how I got the large scallop at the bottom), Aqua Painter (use with ink refills to achieve the watercolored look).


Monday, February 25, 2013

Playing with Pleasant Poppies - Day 1

                                                    Please over over the image and then click the "P" if you would like to pin it to Pinterest.
Good morning!  While most people grumbled about the wicked weather of these past few days, I called into work for a day of PTO, flipped on the fireplace, opened the blinds (so I could watch the storm) and got down to playing.  I had bought the background stamp Pleasant Poppies when it first came out because poppies always remind me of the train rides I took across Italy a few years back.  Poppies always look so happy, and so light & playful.  But, as sometimes happens, the stamp set got pushed aside in the busy-ness of everyday life & I never used it.  So, I decided to dust it off and put it to use.  And the end result is that I have four great cards to share with you, so check back in the coming days for more fruits of my labor.

To create this card, I used:
Paper: Whisper White, Poppy Parade (retired), Marina Mist, and Basic Black cardstock
Ink: Old Olive marker, Marina Mist & Poppy Parade ink refills, black craft ink, Island Indigo marker
Stamps: Pleasant Poppies (background stamp)
Other: adhesive (snail and sticky strip), black embossing powder & heat tool, aqua painter, color spritzer tool

Steps & Tips: 
  • Cut the Whisper White layer - I used 4.75"x3.5".
    Heat emboss the Pleasant Poppies image with Basic Black Craft ink & Black embossing powder.
  • Using your Aqua Painter & a small amount of Marina Mist ink refill, lightly watercolor the background with Marina Mist ink.
  • When the paper dries, color in the stems with Old Olive marker.  Use your Aqua Painter and Poppy Parada ink refill to watercolor in the image.  I like a bolder image, so I used the refill straight out of the bottle.  If you like a softer image, dilute it with water.
  • Once the image is dry, use your Color Spritz tool & Island Indigo marker to spritz a little color here and there to add a bit of interest.  Set aside for a few minutes so the spritz can dry.
  • While you are waiting for the drying process in the steps above, you can assemble your card.  My card is just half of an 8.5"x11" sheet of Basic Black cardstock, cut in half.  The half is then folded in half, so you end up with a 4.25"x5.5" card, which fits perfectly in our envelopes.  The Poppy Parade strip is 4.25"x2.5".  The Marina Mist layer is 1/8" larger on all sides than the Whiper White layer.
  • Tip:  The paper curled a bit because of the watercolor technique, so I used sticky strip (which is a bit stronger than Snail) to adhere the Whisper White layer to the Marina Mist layer.  And then I used snail adhesive for the rest of the layers.

Saturday, February 23, 2013

Color Challenge: cQc #177

 
Please over over the image and then click the "P" if you would like to pin it to Pinterest. 

I saw the current color challenge over at the ColourQ blog, and immediately thought the colors would be great for a masculine card or for Christmas cards.  I opted for a Christmas card so that I would have a head start on them for this year (and also because I was to lazy to go find my more masculine sets)! 

I also received my most recent order from Stampin' Up! this past week and instead of putting things away immediately, I have decided to challenge myself to use each item at least once before putting it away.  Too often, things get put away and then I don't use them quickly.  So, those items were the Scallop Circle die, the 3-1/2" circle die, the Pool Party Embossing Powder, the Pool Party 3/8" Ruffled Ribbon and the Pool Party Baker's Twine.  All in all, a successful challenge, I think!

So now on to the details...to create this card, you'll need:

Ink: Always Artichoke for the pine branches.  I also broke the rules a bit, and used a tinge of Basic Gray (marker) for the tops of the ornaments and for the sentiment because I didn't have a Cherry Cobbler or Kraft Marker and I thought going with Always Artichoke would make for too much green in that "corner" of the circle. I also didn't have anything in Always Artichoke, so I substituted Old Olive.  I used our Illuminate pad to stamp the snowflakes on the Pool Party and Always Artichoke squares in the background.  And if you plan to emboss like I did, you'll need some Versamark ink.

Cardstock: all five colors from the challenge: Cherry Cobbler, Pool Party, Kraft/Crumb Cake, Whisper White, and Always Artichoke (I used Old Olive).

Stamps: a Christmas sentiment (I used a portion of a stamp from the For the Birds set), pine branches (I used the pine bough from Watercolor Winter), snowflakes or other background stamps for the faint background on the Pool Party and Always Artichoke squares (I used Snowflake Soiree), ornament stamps (I used Ornament Keepsakes).

Other: Big Shot machine, Holiday Ornaments Framelits, ribbon and bakers twine (I used Pool Party Baker's Twine and Pool Party 3/8" Ruffled Ribbon, and some retired narrow ribbon in Old Olive), Scallop Circle Die, 3-1/2" circle die, Iridescent Ice Embossing Powder, and Pool Party Embossing Powder, an Embossing Heat Tool and Smooch to paint over the branches for a snowy look.

This picture isn't the greatest - I was having a hard time with glare from the embossing powder - but it does show you the highlights from the embossing powder and smooch.  It also shows you two different ways you can layout your ornaments.

Hints:
  • I used Smooch on the branches for a subtle snowy shimmer.  You could also use a Versamark marker and Iridiscent Ice for a blingier effect.
  • I used a marker to color just the "Merry Christmas" part of the For the Birds stamp.
  • I stamped snowflakes on the Pool Party and Old Olive squares to add sublte interest.  You could use any stamps that works for backgrounds.  You could also use Versamark or Pool Party and Old Olive ink for a more dramatic effect.  Or you could emboss them with any number of our Textured Impressions Embossing Folders.
  • The Pool Party ornament is embossed with Pool Party Embossing Powder; the Cherry Cobbler ornament was stamped with Versamark, then Cherry Cobbler ink, then I used Iridescent Ice Embossing Powder on it.
  • You can get directions for an Easel Card here.
  • The layout of this card inspired my layout.
  • You might have also noticed that my card is larger than the standard 4.25"x5.5" card.  I did that to accomodate the Scallop Circle Die, which is almost 5" in diameter.  Luckily, I have some old envelopes in my stash that will accomodate them, so I designed them with those envelopes in mind.  My envelopes are roughly 5"x7".  So my card is 5"x5" when closed.  So for the easel directions, I cut one square of Crumb Cake to 5"x5", and I cut the other piece to 5"x10" then scored at the 5" and 2.5" marks.
  • When you decorate the bottom of the base, make sure you add enough layers/thickness that it can hold up the card when it's open.
  • Don't forget to decorate the inside for an added surprise!  I will stamp a sentiment or write a note next December when I get ready to mail it.
Pin It button on image hover