Monday, September 14, 2015

Butterfly Basics


I'm so excited!  I just made my first sale on my Etsy shop.  As a thank you to this customer, I made a card to include along with the item she ordered.  I used Whisper White, Crushed Curry, and Always Artichoke for my color palette.  I chose to add a bit of bling to the butterfly using adhesive rhinestones, and added some extra interest by heat embossing the image in black, using the border & background stamps from the Butterfly Basics stamp set, and using a tool to spritz some ink to create a grungy look.

I got my inspiration from a card I saw on Mary Fish's website.  I changed a few things but I still think both are lovely.  I hope my new customer enjoys it...I left it blank & included a blank envelope so that she could send it to someone else.


To buy the supplies to make this card, please click on the product images below.


Built for Free Using: My Stampin Blog


Sunday, September 13, 2015

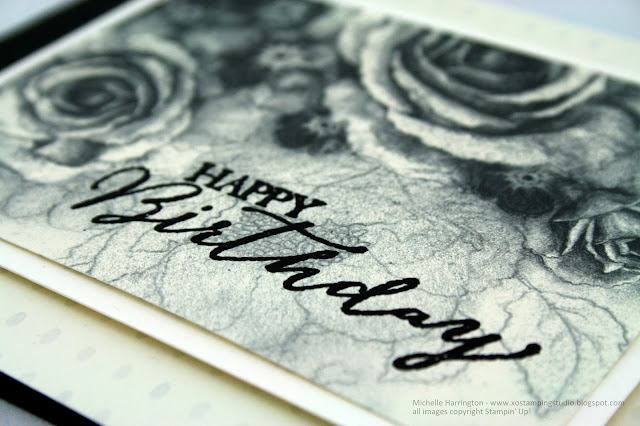
Timeless Elegance Birthday Card


My husband and I decided to take today off from all responsibility - we mowed yesterday, cleaned and grocery shopped the day before and so today he is watching movies & I'm playing with paper.  I decided to go online and look up some card challenges to use as my point of inspiration and was excited to find the sketch challenge at Always Playing with Paper and decided to give their sketch a whirl.  I'm really pleased with how it turn out.  Such a simple card, really...but lots of "wow"!


If you'd like to buy this card, you can do so in my Etsy shop.

If you'd like to buy the supplies to make this card, you can do so by clicking on the product images below.


Built for Free Using: My Stampin Blog

Thursday, September 10, 2015

Stars Challenge 9/10/15


This week's team challenge was to create a card using the following sketch.  Isn't it versatile?  I chose to rotate the card 90-degrees, but you could also replace the strips underneath the square with banners or ribbon or you could use patterned paper instead of the solid cardstock I chose.  And that square, well, it could be a circle, or any of the Thinlits shapes...the sky is the limit.  As for me, I have had one of this year's new Christmas paper packs, Merry Moments, laying around and decided it was time to start using it to plan upcoming classes & to start preparing for Christmas.  I drew color inspiration from the patterned paper, using Mossy Meadow, Real Red, and Old Olive for my colors.  Also, I added a bit of bling to the Tree using our Rhinestones.  When you buy a pack of our rhinestones, they come with many individual rhinestones of varying sizes and then several strips of the smallest rhinestones, which made it super easy to just line up over one of the plaid lines on the tree.  I just trimmed them to the right length with my X-acto knife and then used the point of the knife to transfer the strip of rhinestones from the packaging to the paper.  I experimented with placing the cut-out tree on plain red cardstock, but it needed something, so I ran the cardstock through my Big Shot in the On Point Textured Impressions Embossing Folder.  The tree & inside sentiment are stamps from the Lots of Joy stamp set.  I've got several more designs up my sleeves using these papers & stamps so check back often!

DSC#148


If you'd like to buy this card, bop on over to my Etsy store by clicking HERE and I'd be happy to help you out! 

If you'd like to see how my friends interpreted this sketch, click on their names below:
Connie Plaumann
Sharon Bennett
Robyn Rasset
Judy Strickling
Ashley Simmons
Miriam Bollinger
Dawn Olchefske


Wednesday, September 9, 2015

June My Paper Pumpkin


Recently, I posted a few cards I made with my June "My Paper Pumpkin" kit, which you can see HERE.  As I mentioned, I only had time to make half the kit that day.  Since then, I was able to make the rest, so now I'm sharing with you the other half.

The muted greens, blues and taupe made me think of traditional baby boy and I have a few friends who are expecting, so I decided to make a few of them into baby cards, but it also never hurts to have birthday cards laying around.  Thus, I used the "it's your day" sentiment that came with the kit on the outside of two of the cards & then used a "happy birthday" stamp from my stash on the inside of those two cards. For the other two cards (the baby cards) I used two stamps from the Petite Pairs stamp set ("welcome baby" and "glad you're here").  If you haven't seen that set yet, go check it out...it's very versatile and unique in our lineup because it allows you to have stamped sentiment on both the inside and outside of the card.

They still haven't made this kit available for purchase, but my hope is that they will so keep an eye on my blog or store for details.

Happy stamping!

Monday, September 7, 2015

Gently Falling - Thank You


The other day, I participated in a challenge to use only Mossy Meadow and neutrals.  I completed that challenge but while I had the materials out, I decided to make another card.  This one just kind of fell together.  I had the chevron background already cut out, leftover from the day I made these cards. And the rest of just kind of happened from there.  The stamps used here are both retired, unfortunately, but you may be able to find them on Etsy or Ebay.  They are Gently Falling (leaf) and So Very Grateful (sentiment).  The Ink is Mossy Meadow.  The cardstock is Very Vanilla and Mossy Meadow.  And though you can't tell it from here, I did pop the sentiment with some dimensionals (foam adhesive).

Here are some other cards I've made using this set:
Monochromatic Thank You Note
Fall-Themed Thinking of You card
Sympathy Card

Saturday, September 5, 2015

CMCC#87 - Colour Me... Monochromatic!


I was eager to do this week's challenge because...well, it was going to be a challenge for me.  You see, I love color...lots of it...and I also tend to not use green.  So it was a bit harder for me to come up with something that I'm satisfied with, but I liked that.  Mossy Meadow really is a pretty shade of green.  It's almost, I don't know...suedy?  Anyway, this is what I came up with.  A pretty card with leaves from the retired "Gently Falling" stamp set & sentiments from the retired "So Very Grateful" set as well as a retired wooden button.  I also used some leftover twine from June's My Paper Pumpkin kit, some Very Vanilla Cardstock as my neutral, and the current In Color Ribbon.  I even took the time to decorate the inside a bit, which I love, but don't always make the time do.  I hope you enjoy my take on the color combo Mossy Meadow + Neutral.  Happy stamping!


And here is the inspiration palette:


Check out their blog and see how other artisan's interpreted this color scheme HERE.

Friday, September 4, 2015

Sprinkles of Life - Bird on a Branch


I almost titled this blog post "Tree Bird" kind of like "Free Bird" but then I refrained from my musical nerdery.  So, anyway, this card is the result of a series of happy accidents.  I set out to copy a similar card I found on this blog.  But, when I went to cut out the circle, I realized I didn't have the right-sized circle punch (all mine were too small), so I decided to use my Circle Collection Framelits.  When I did it, I cut it on what I thought would be the upper right quadrant.  However, when it came out, one side of the paper had some scratches on it from my older cutting mat, so I flipped it over to get the smooth side.  But when I did, it put the circle at the bottom right instead. The upside of this was that it had embossed a circle border around the hole, which was pretty cool, I thought...a nice extra detail that I hadn't planned!

To create some interest, I added small strip of patterned paper from the Cherry on Top stack to the left-hand side.  Then to cover the seam between the cardstock and patterned paper, I adhered some of our 1/4" Cotton Ribbon to the card, and made sure the bow was in the upper left corner to balance out the stamped images on the lower right.  To create the tree-bird cluster, I used images from the Sprinkles of Life set.  First, I stamped the branch with Tip Top Taupe ink onto Tip Top Taupe cardstock and then punched it out using the Tree Builder punch.  Next, I stamped the bird in Watermelon Wonder ink on Watermelon Wonder cardstock, and again punching it out with the Tree Builder Punch.  Finally, I stamped the leaf cluster using Cucumber Crush ink on Cucumber Crush cardstock, then using my paper snips to cut out a small cluster of the leaves.  Then I stuck it all down, making sure to use a chunk of Dimensionals to make the bird pop.  On the inside, I stamped the "I'm so lucky to call you my friend" sentiment, also from the "Sprinkles of Life" stamp set....but really this is a versatile enough card you could use just about any sentiment.  You could also modify the colors to make it a more seasonal card - I think a little brown or black bird amid fall-colored leaves would be pretty, as well as a little red cardinal among a glittery white scene.

If you liked any of the products I used, I'd be honored if you chose to purchase from my store - just click on the product you want and it'll take you there!  Happy stamping!

Thursday, September 3, 2015

DOstamper STARS Challenge - Color My World DSC #147


When I saw this week's color palette, my mind immediately went to one of my favorite places on earth: Minnesota's North Shore.  If you've never been there, you really should go.  It's breathtakingly beautiful with the stunning blues of Lake Superior, miles of rocky, craggy shoreline, waterfalls, lighthouses, tall whispering pines & plenty of hiking.  So I decided to capture that feeling by using an image of nature (from retired stamp set Moon River) and rustic materials (leftover twine from the June My Paper Pumpkin kit and the Woodgrain Textured Impressions Embossing Folder).  


Be sure to check out my friends' logs by clicking on the links below to see their interpretations of this color scheme.  I think you'll be just as delighted as was!

Judy Strickling
Ashley Simmons
Sharon Bennett
Miriam Bollinger
Connie Plaumann
Dawn Olchefske
Robyn Rasset


Wednesday, September 2, 2015

STARS Challenge - Sketch Pad DSC #145


Awhile back, my upline and teammates completed a sketch challenge.  I wasn't able to do the sketch at that time, but I loved it so much, I filed it away for "someday".  Someday is today! :)  I interpreted it pretty literally this time, right down the flower accent!

I chose to use the Cherry on Top Designer Series Paper to keep it happy and playful.  The fun thing about this paper is that there are some specific themes (like cherries, cupcakes, and ice cream) which are fun, but limiting.  However, there are also plenty of other papers that don't really feel thematic that you can use for projects like this Thank You note.

I decided to use the posy stamp from June's My Paper Pumpkin to create the floral embellishment.  I think that flower stamp is just so cute, and also fit my lighthearted, happy theme.  Accented with a Bermuda Bay button and white baker's twine, it's an easy but oh-so-cute addition to this card.  While I chose to make it a thank you note, you eliminate the sentiment entirely, or you could use any number of other sentiments because this card is somewhat neutral.  I think this would also be a great layout to use for birthdays, Christmas, valentine's....well, you get the idea! 


DOstamperSTARS Thursday Challenge DSC#145

For more inspiration, check out the work my teammates did using this sketch:


  • Connie Plaumann: Halloween Treat card
  • Sharon Bennett: Garden in Bloom cards
  • Miriam Bollinger: Flowering Flourishes card
  • Robyn Rasset: Chalk it up to Love card
  • Judy Strickling: A Ray of Sunshine card
  • Ashley Simmons: Celebrate Today card
  • Dawn Olchefske: Acorny Thank You


  • As luck would have it, around the time I was working with the DoSTAMPers sketch, I noticed a similar sketch floating around the internet.  So for even more inspiration, go check out these interpretations!


    If you'd like to purchase this card, please visit my Etsy shop.

    Come back tomorrow to see the new Stars challenge...and until then, happy stamping!
    Pin It button on image hover