Showing posts with label Thank You Notes. Show all posts
Wednesday, September 26, 2018
DOStamper Stars Challenge - Sketch Pad DSC #299
Good evening! The last few weeks we have been treated to some cooler weather, with a few hot days mixed in. The leaves are turning and starting to fall. The smell of leaves, fire and harvest are in the air. So, after coming in from a golden evening playing outside with my daughter, I was in the mood to make something fall. I used the sketch below, but turned it on its side and I'm really happy with how it turned out. I have the perfect recipient in mind, too!
The colors I used are Pumpkin Pie, Cajun Craze, Early Espresso, Very Vanilla, and Old Olive. I used the new Buffalo Check background stamp and the Falling for Leaves stamp set and accented it with a simple strip of Braided Linen Trim. I watercolored with my ink refills and an Aquapainter on our watercolor paper. That was so relaxing!!! You have to try it if you haven't. To give it a little dimension I heat embossed the leaf image. That also helped keep the ink in place -though there are a few places where it escaped. And that's okay. I was going for a rustic look anyway! Happy stamping!!!
Wednesday, September 5, 2018
DOStampersStars Thursday Challenge ShowCASE DCS#296
Good evening, stampers! If you follow my blog, you've noticed that I've been MIA. I had a sweet little one join our family just over a year ago and she has been keeping me busy. I've been struggling because I want to make the time to stamp, but I also feel like I don't have time to regularly make the extremely detailed cards that are my favorite to work on. And so, instead of doing something, I've done nothing. And all it's done is make me miss this habit...I mean...hobby even more. And then I got to thinking...I'm just like everyone else. While we may have different demands on our schedule, we all have demands on our schedules. It might be caring for kids, or elderly parents, it might be serving your church or community, it might be a job or jobs, other hobbies, caring for your home or cars, etc.
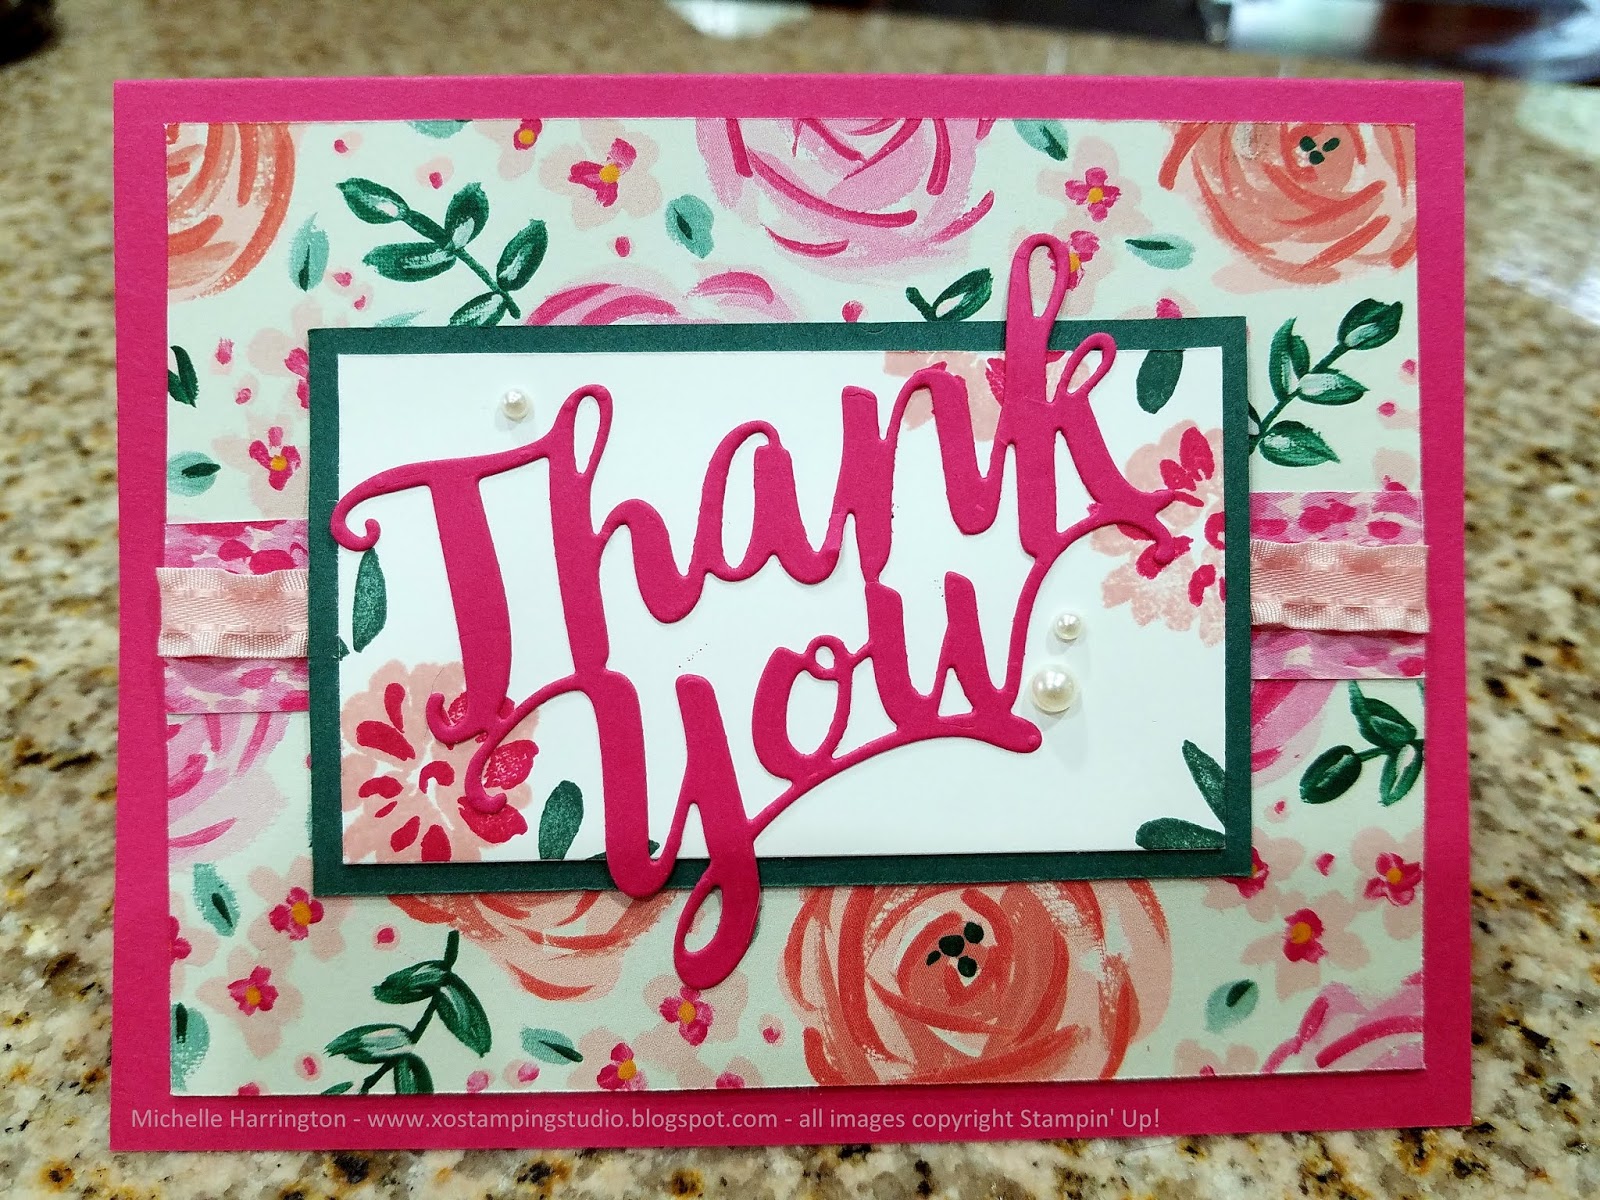
So then I thought "hey, maybe my stampy friends would enjoy some inspiration that is easy to replicate so that they, too, can squeeze in a bit of crafty time. So, I gave myself an hour today, sat down and made this card. It took less than an hour (and that includes pulling out all the supplies, dragging them upstairs to work and then going back down several times for things I needed). You could save yourself even more time and make several while you have everything out. I used our Thursday challenge image (below) as inspiration. I kept the landscape orientation, and I also kept the central focal point as well as the horizontal details underneath the focal point. I kept floral theme and also used a large sentiment. The steps are simple and found further down in this post.I hope this post finds you well and hope that you are able to make a little time for yourself in the midst of all the busy-ness we seem to have in our modern lives.
(1) Cut out your base layer (I used Melon Mambo) and score/fold it to create the card.
(2) Pick a pretty piece of Designer Series Paper (I used Garden Impressions) and cut it down to 4"x5.25".
(3) Cut a strip of coordinating Designer Series Paper (DSP) down to 5.25" by 1" (again, I used Garden Impressions). Tip: this is great way to use scraps. Adhere it across the middle of the 4"x5.25" piece. I like to use Snail adhesive for this.
(4) Choose some ribbon (I chose the 3/8" Mini Ruffled Ribbon in Powder Pink) and adhere it down the middle of the DSP strip. I like to do this step now so that the ends of the ribbon can be tucked under this panel before it is stuck to the card base.
(5) Cut a 3.5"x2.25" rectangle of colored cardstock that coordinates with your DSP (I chose Shaded Spruce).
(6) Cut a 3.25"x2" rectangle of Whisper White Cardstock (can use some other light neutral, like Very Vanilla, if it coordinates better with the paper you chose).
(7) Stamp the white rectangle with images and colors that work with your DPS (I chose the Abstract Impressions stamp set, which was designed to go with the Garden Impressions paper).
(8) Stamp or adhere a die cut sentiment to the center of the white rectangle. (I cut Thank You from a scrap of Melon Mambo).
(9) Adhere the white layer to the colored layer, then layer that over the center of the DSP assembly. Then adhere all of that to the card base.
(10) Decorate with small accents. I chose our adhesive pearls.
Tuesday, August 14, 2018
Paper Pumpkin "May Good Things Grow"
Hello! These past few weeks, I had a chance to sit down and play with the "May Good Things Grow" Paper Pumpkin kit. And it was sure fun! I made the middle card per the kit's directions, but made the first and last cards using my own design from the supplies in the kit. Even though you can't buy this kit anymore, I'm hoping that this will inspire those of you who have the kit to use it. It is gorgeous. And if you haven't tried Paper Pumpkin, but like this project, you may like future months. I invite you to give it a try - just reach out to me!
Here is the YouTube video showing how the make the kit the intended way, in case want to compare. Happy stamping!
Thursday, April 27, 2017
Goodbye, By the Shore!
It usually happens that as the catalog year draws to a close, I discover a few products that I really love that I didn't give any attention to during the life of the catalog. That is the case with Stampin' Up!'s By the Shore Designer Series Paper.
The color combination (Calypso Coral, Dapper Denim, Mint Macaron, Very Vanilla, and Soft Sky) paired with the nautical/sea themed patterns just naturally lent themselves to some really beautiful but easy-to-make cards. I will be sad to see this paper pack go. Because it is retiring, it will only be available while supplies last - so if you like what you "sea" (sorry, I couldn't resist), make sure you pick up a pack (or two) for yourself soon!
Also retiring are the "Me = Grateful" stamp set (the sentiment on the middle card above), Petite Petals (the light blue flowers on the tag of the middle card), and Picture Perfect (the starfish) on the top card. Don't miss out! These stamp sets will be unavailable beginning in the end of May. The sentiment on the bottom most card is from Neat & Tangled.
Wednesday, April 26, 2017
Oh, Whale! Baby Shower Thank You's
In March, my aunt and cousin threw a baby shower for our first baby. We are doing the nursery in a sea life theme, so they decided to carry that theme into the shower by sending out the cutest little whale invitations and using whale plates and napkins. It was such a wonderful shower with the ladies in my family, the ladies in my husband's family, a close friend and her daughter (both of whom are pretty much family).
The whale theme was a surprise to me, and I was so happy when I was able to make some thank you notes after the shower using the whale set (Oh, Whale!) I had
The wavy embossing, stitched square and clouds were all made using current Stampin' Up products (click on the words to see them in my store). The colors are Blushing Bride, Marina Mist, Pool Party and Whisper White. I've also started lining all of my envelopes. This envelope liner is paper from the Playful Palette stack, which is on sale for six bucks and retiring...which means it's only available until the current stock runs out!
Wednesday, August 24, 2016
DOstamper STARS Sketch Challenge DSC#195
Lately, I’ve been trying to finish up some of the projects I’ve
left lying around half-finished for a while.
One of those projects was finishing up an old Paper Pumpkin kit (Blissful
Bouquet) that I had started and never finished.
Once I got those done, I decided to try to use the stamp set from that
kit to create a card using this week’s sketch challenge.
Even though my part of the world has seemingly moved into “autumn mode” I decided to resist the lure of deep, rich fall colors and, instead, chose the cheery colors of Delightful Daffodil and Pool Party. I think the yellow/white/blue combination is classically cheerful & always had such a clean feeling. I love it. This card was unusual for me in that I didn’t add a single embellishment….but I quite like the simplicity of it for a change.
After finishing the card for the challenge, I decided to
make a similar card with some variances, which you can see below. Which do you like better?
Be sure to check out how my friends used this sketch to
create their cards this week by clicking on the links below:
- Sharon Bennett
- Connie Plaumann
- Dawn Olchefske
- Joan Weidling
- Angela O'Neill
- Michelle Harrington
- Miriam Bollinger
- Dawn Thomas
- Judy Strickling
- Robyn Rasset
Wednesday, May 4, 2016
Another Thank You, Watercolor & Sequins
Hello! I'm glad you've found me! Today, I chose to participate in the Thursday challenge with my fellow STARS teammates. Originally, my goal was to watercolor the full face of a card using the reds, pinks, yellows and greens in the image below -- I thought I could use ink refills as watercolors, and use a swirling motion to create pretty rose-like images and then stamp a lovely feminine greeting on it for Mother's Day. But sometimes, the best laid plans fail. No matter how hard I tried, I just couldn't get it look right. With three attempts now in the trash, I decided to switch modes and use different colors and attempt swirls, rather than roses and I love the affect. It might be hard to see how I got from the image below to the image above but trust me, it's the evolved result of several trials and errors. I still want to try for the roses at some point, but I needed to take a break from that endeavor as frustration set in. As far supplies go, you'll be pleased to know they are probably already in your craft stash, but most are readily available from Stampin' Up! if you find yourself "in need". I used my Tempting Turquoise, Pacific Point, and Bermuda Bay ink refills, our Aqua Painters, our watercolor paper and some hoarded sequins (non-SU!). The sentiment is from the "Another Thank You" set, which is retiring on May 22nd, so you may want to get it now, while you still can. It comes with several other "thank you" related sentiments, but this bold image is what drew me to this set originally. Thanks for stopping by! Please check out the beautiful cards my teammates made by following the links below and have a great day!
Monday, September 7, 2015
Gently Falling - Thank You
The other day, I participated in a challenge to use only Mossy Meadow and neutrals. I completed that challenge but while I had the materials out, I decided to make another card. This one just kind of fell together. I had the chevron background already cut out, leftover from the day I made these cards. And the rest of just kind of happened from there. The stamps used here are both retired, unfortunately, but you may be able to find them on Etsy or Ebay. They are Gently Falling (leaf) and So Very Grateful (sentiment). The Ink is Mossy Meadow. The cardstock is Very Vanilla and Mossy Meadow. And though you can't tell it from here, I did pop the sentiment with some dimensionals (foam adhesive).
Here are some other cards I've made using this set:
Monochromatic Thank You Note
Fall-Themed Thinking of You card
Sympathy Card
Saturday, September 5, 2015
CMCC#87 - Colour Me... Monochromatic!
I was eager to do this week's challenge because...well, it was going to be a challenge for me. You see, I love color...lots of it...and I also tend to not use green. So it was a bit harder for me to come up with something that I'm satisfied with, but I liked that. Mossy Meadow really is a pretty shade of green. It's almost, I don't know...suedy? Anyway, this is what I came up with. A pretty card with leaves from the retired "Gently Falling" stamp set & sentiments from the retired "So Very Grateful" set as well as a retired wooden button. I also used some leftover twine from June's My Paper Pumpkin kit, some Very Vanilla Cardstock as my neutral, and the current In Color Ribbon. I even took the time to decorate the inside a bit, which I love, but don't always make the time do. I hope you enjoy my take on the color combo Mossy Meadow + Neutral. Happy stamping!
And here is the inspiration palette:

Check out their blog and see how other artisan's interpreted this color scheme HERE.
Wednesday, September 2, 2015
STARS Challenge - Sketch Pad DSC #145
Awhile back, my upline and teammates completed a sketch challenge. I wasn't able to do the sketch at that time, but I loved it so much, I filed it away for "someday". Someday is today! :) I interpreted it pretty literally this time, right down the flower accent!
I chose to use the Cherry on Top Designer Series Paper to keep it happy and playful. The fun thing about this paper is that there are some specific themes (like cherries, cupcakes, and ice cream) which are fun, but limiting. However, there are also plenty of other papers that don't really feel thematic that you can use for projects like this Thank You note.
I decided to use the posy stamp from June's My Paper Pumpkin to create the floral embellishment. I think that flower stamp is just so cute, and also fit my lighthearted, happy theme. Accented with a Bermuda Bay button and white baker's twine, it's an easy but oh-so-cute addition to this card. While I chose to make it a thank you note, you eliminate the sentiment entirely, or you could use any number of other sentiments because this card is somewhat neutral. I think this would also be a great layout to use for birthdays, Christmas, valentine's....well, you get the idea!
For more inspiration, check out the work my teammates did using this sketch:
As luck would have it, around the time I was working with the DoSTAMPers sketch, I noticed a similar sketch floating around the internet. So for even more inspiration, go check out these interpretations!
If you'd like to purchase this card, please visit my Etsy shop.
Come back tomorrow to see the new Stars challenge...and until then, happy stamping!
Thursday, August 20, 2015
Lotus Thank You
I don't know about you, but I go through Thank You cards faster than any other kind of card, so I like to have plenty on hand. However, recently, I had run out so I wanted a quick way to replenish my stock, but I didn't want it to look just slapped together, either. Even though this card is simple, the layers of stamping, a small amount of bling, and good balance made this card come together quickly but still beautifully! While this stamp set, Lotus Blossom, is retired, this card could easily be adapted to any color scheme, any sentiment, and any stamp set. It lends itself particularly easy to any floral set. Quick, and easy! You'll notice I used a rounded corner and similar layout on the inside to tie the card together:
If you would like to purchase items to make cards like these, please check out my stamping store.
If you would rather purchase the card, come check out my Etsy Shop: xoStudioDesigns.
Sunday, July 26, 2015
My Paper Pumpkin - July 2015 - Thanks a Latte
Yesterday, I shared with you the cards I made with July's My Paper Pumpkin kit, "Thanks a Latte". In making them, I followed the directions pretty closely. Today, I decided to use the set of stamps to create a card of my own. That's another bonus to these kits - when the original contents are gone, you still have the stamps and ink to play with.
I decided to hunt through my paper to see if I could find delicate, feminine patterns that reminded me of delicate china teacups. I didn't have to search too long, our new Pretty Petals DSP was the perfect fit. The patterns here are only a small representation of the patterns in this stack of pretty paper - each of them is striking!
I went ahead and stamped the image six times, once on each piece of patterned paper, using the Early Espresso ink included in the My Paper Pumpkin kit. Maybe I'm too picky, but because these looked like delicate tea cups, I felt weird putting "Thanks a Latte" on them (lattes make me think of giant chunky mugs). So I picked a small "thank you sentiment" from a stamp set in my stash. But you could use any sentiment you have, including the ones from the kit. Then I hand cut them using my paper snips. I adhered them onto some Very Vanilla cardstock and then on some Old Olive Cardstock. Next I assembled my card base using Calypso Coral, and then layered it with Old Olive and a piece of patterned paper from the Pretty Petals DSP stack. I grabbed some retired Old Olive ribbon from my stash as well as a retired Early Espresso button, and then tied it all together with some (also retired) Early Espresso baker's twine. Voila! I pretty little card using the stamp set from this month's My Paper Pumpkin.
Happy stamping!
Saturday, July 25, 2015
My Paper Pumpkin - July 2015 - Thanks a Latte
I have been subscribing to My Paper Pumpkin almost from the beginning, but it's only been in the past few months where I've started doing them almost immediately...I just can't resist them! They have really stepped up their game and deliver some fun, quick projects for only about $20 a month.
This month's kit, Thanks a Latte, features the supplies to make 8 cards (everything you see on this card - the base cards, the patterned paper, the "notebook" paper, the accent stickers, the ribbon-tied paper clips and even the dimensional adhesive). The kit even includes the fun coordinating envelopes that remind me of the retro-style air post envelopes. It also includes mini ink pads (Early Espresso and one of our new colors, Cucumber Crush) and a versatile stamp set that features one tea cup, two plant outlines and two plant "fill-ins", a tea bag, and three greetings ("get well", "a cup of cheer", and "thanks a latte').
If you wish you had this one, keep your eyes peeled on my blog because I will share if they make these kits available to subscribers. And if you've been on the fence about subscribing to My Paper Pumpkin, now is the time! We are offering 50% off your first two months (new subscribers only). Read more about the promotion HERE! If you feel like now is the time to sign up, I'd be delighted if you chose me as your demonstrator. You can do that by signing up for My Paper Pumpkin HERE!
A lot of times I do my kits while watching television with my husband. I love doing that instead of cards from scratch because everything is one place and I don't have to keep getting up and down and ruining the shows for us. I've also used them on vacations and road trips, and sometimes carry them in the tote bag I take everywhere so that if I'm stuck waiting somewhere, I can just pop it out and do a few things. I have friends who are considering gathering a group over their lunch hour to assemble them. They are perfect for all of these situations because they include almost everything you need. You'll need to provide a stamp block, and some months, a pair of paper snips. I usually just toss those in as soon as I open the kit. I usually toss in my favorite adhesive as well, just in case!
Happy stamping!!!
PS - come back tomorrow to see another card I made using the stamp set from this kit!
Sunday, April 13, 2014
A Thousand Thanks!
You may recall a few weeks ago, I was trying to use of scraps of the Birthday Basics Designer Series Paper. Well, the quest continues, and today I find myself using even more of it. To see my previous project, click here! My inspiration comes from this pin (original artwork at www.scrappinpretty.com). I thought it was such a clever way to use the numbers in a non-birthday application. Just goes to show you that even "themed" paper can be used in other creative ways. It got my mind racing: you could use it for a "across the miles" card, or a fishing scrapbook layout...aren't they always measuring and exaggerating the lengths of those fish? I hope you like my interpretation of this card. About the biggest change I made was to use Raspberry Ripple as the card base, rather than Very Vanilla, because it is sturdier. Having said that, I like the clean appearance of the Vanilla.
Supplies used: cardstock in Raspberry Ripple, Bermuda Bay, and Very Vanilla, Birthday Basics Designer Series Paper (#130145), a Candy Dot in Bermuda Bay (regals, #130932), ink in Bermuda Bay, and a sentiment from Lots of Thanks (wood #129687, clear #129690), and a 3/16" corner punch (#119871). If you'd like these, or other current SU! supplies, I'd be honored if you chose to purchase them at my store.
Subscribe to:
Posts (Atom)